Showing posts with label durability. Show all posts

Tuesday, August 8, 2023

Do not submerge your Nexus gear hub

Title says it all.  These things hold up great in rain and snow and filth, but really badly under water.

Funny thing, its rained a lot here recently.  So a family member was on the way home from work, and found that the river was invading the bike path.  We had a talk on the phone, and I failed to think very far ahead, which did generate some extra work and possibly lead to long-term damage to some bike components, but on the other hand, now I have had a new experience.

So the family member found a way through the flooded section that was acceptable for legs, but which saw the bike pushed through water that was way over the wheel centers.  In fact this was an electric bike, and the electrical-connector-end of the battery went in the river, plus the motor, and all the control circuits.  Did you know an E-bike could survive that?  I did not.

Anyway the bike was apparently making some funny noises when it got home, but only while pedaling.  I had also in the back of my mind the old Nexus 7 that a kid had (apparently) submerged in a forest, followed by neglect, events that accelerated the crapification process of that hub remarkably.  So the wheel came off, the hub guts came out, and it was quite wet inside.  I think a small amount drained out as I took it apart.  So it got a long tour at the end of the boot drier before re-greasing and re-assembly.

The hub seemed a bit under-greased, perhaps that made the water ingress worse.  This hub at the time of this writing is their latest Nexus 8 model, a SG-C6001-8C (coaster brake, regular bearings).  So it ought to have the best available seals.

So the next day I went to assist this family member on the way to work, so I could see that the bike was OK.  (It was after all an E-bike that got partially submerged, plus the hub I worked on.)  We came to an uninteresting little underpass that had a puddle in it.  Which was deeper than the wheel centers, this time on two bikes.  (I wonder how many bikes that claimed in the past couple days.)

So when I got back home, I had front and rear hubs to think about.  I wasn't really sure there was enough time under water to make a difference, probably under 10 seconds of submersion.  This was however my favorite Nexus 8, a SG-C6010-8R.  (It has the good bearings on the planet gears.)  So I took it all apart, and sure enough there was some water droplets in there.  Less water than the other hub, but not dry.  It also got a tour with the boot drier.

So anyway, approximately no submersion is acceptable for a Nexus 8, not even the latest models.

I don't actually know what the long-term effects of not taking action would have been.  Some internal rust, certainly on the first hub.  It also seemed low on grease, so it would probably have undergone rapid crapification.  Even with intervention, I can't be certain that these two didn't retain water deep inside where it will rust in the coming weeks and months.  (I have never taken hubs apart beyond exposing the innards as a unit.)  I also do not know what amount of water ingress is tolerable for these hubs.  They are designed to be used in wet conditions, and thats how I always use mine.  I have never had an internal rust issue except for the Nexus 7 that took a bath and subsequently neglected for a year or so.  That hub still lives in a kids bike.

I should also say that the front hub on one bike also needed new grease after all this bathing.  The other hub... is an electric motor that shows no outwards signs of harm.  Not something I am eager to take apart.  Fingers crossed.

Sunday, May 5, 2019

Greasing a Nexus

Niholas usually have hub gears, and these days those are usually Shimano Nexus 8 after the unfortunate demise of SRAM's P5 and S7 on the market.  These need grease once in a while.  For me, that means whenever they have a hard time holding one or more gears, or otherwise seem too crappy.  (Fun thought on crappiness: at least in hilly Oslo conditions, switching between Nexus 7 & 8 and SRAM S7 is a process of relief from the irritations of whatever hub you were riding, followed by growing irritation at the issues of the one you are now riding.)

So for a while after moving to Oslo I took my hubs down to Copenhagen for greasing, which came to an abrupt end after one visit to a well-established chain-store shop in Birkerød (north of Copenhagen).  I brought them two wheels without the bikes, one a Nexus 8 and the other a Nexus 7, and got back to two nicely cleaned hubs a couple days later.  All was well until I arrived home in Oslo and put the Nexus 7 to use as winter began.  Soon it was leaking, and smelled fruity.  Actually the smell was exactly like a "Muc Off" chain lubricant which has the distinction of not only smelling fruity, but being somewhat pink in color, achieving who knows what.  (The leakage wasn't pink of course, it was filthy, but I am really suspicious about the origin of the lubricant they used at the shop.)  So it leaked and stank, and eventually seemed rougher, and if I recall correctly was not as secure about holding a gear.  To cut the story short, the Nexus 8 had the same issue.

Screw the so-called professionals, it was time to fix this myself (the internet explains how).  I don't intend to write a hugely detailed rundown of how to take apart a hub, but basically you take the hub apart on the drive side until the sprocket is removed, then flip it over and use two thin wrenches (cone wrenches) to remove two nuts from the axle, then lift off the non-drive-side end of things and drop out the internals via the drive side.  I like to put the axle nut on the non-drive side to make it nicer to hold, and I made a handy hub-holder by drilling a hole in a board.  High tech stuff here.

tools of a nonprofessional hub greaser
10 year old Nexus 7 (SG-7C18)
after a dip
Nexus 8 (SG-8C31) dripping out
some pink stink after two
dip & grease rounds
I clean the hub shell out thoroughly via baby wipe and toilet paper, and also remove some grease-mess from the surface hub internals, but not so much.  I have not thus far attempted any disassembly of the hub internals, although I think the Nexus 8 might benefit from getting grease into gears that are not otherwise exposed (thats on the to-do list).  Hubs with coaster ("foot") brakes (as mine have) can have the brake pads jump off and they need to be set back correctly.  The brake pads on Nexus 7 have a spring which pulls them a little closed, so they need to be pried open a bit to sit on the hub.  You'll figure it out.  Kind of like Legos, with grease.

Shimano recommends a dipping kit, so I found one online, plus their official hub grease.  I dip the hub for "a while" and then remove it so it can drip for "a bit" before I put grease all over interesting places.  One thing I wondered in the years before I attempted this was how to grease the coaster brake components.  My answer: a whole ton of grease, just go nuts at that end of the hub.  Often I have extra grease pressing itself out the non-drive-side the first ride, but I don't much care.  Dry brake pads are lame, and there are hills here in Oslo.  I have read that some people may want different grease for the braking surfaces, so far I have not been sufficiently professional (or wise) to do anything like that.

So I have now done this procedure on a Nexus 3 & 8, plus at least three Nexus 7's, and of these hubs I've opened several more than once.  (Score keeping: I have 5 Nexus 7 hubs, also a rare Nexus 5 SG-5R30.)  But about opening some more than once.  You see, there is a drawback to doing this yourself.  Shimano likes cup & cone bearings, and those need to be tightened correctly, or else.

Nexus 7 (SG-7C30) with sad bearings
Nexus 8 (SG-8C31) with sad bearings
Now, I have read a bit about how to tighten cup & cone bearings and honestly what I read was not super helpful in this context, which is a gear hub with a coaster brake and bolt axles.  My current procedure is to get the wheel set in the frame, pull it back so the chain is sufficiently tight, and then tighten down the drive-side bolt in a serious way.  The frame should either be upside-down or hanging on something; the rear wheel needs to spin freely.  Then I loosely attach the brake arm and non-drive-side axle bolt, but do not tighten it so much that any pressure is applied to the nuts that adjust the bearings.  Then I turn the first (the larger) of the two tightening (cone adjustment) nuts until the wheel shows signs of increasing resistance when spun.  At some point I decide that it seems tight enough, then I tighten the second (smaller) nut good and tight (while holding the larger in place) and properly tighten the axle nut.  Now the wheel is probably tighter than it was before the axle nut was tightened.  If its too tight, rewind a bit, loosen things, tighten things again.  Spin the wheel a lot and go by feel.  If it spins really easily, thats probably bad.  Next time I go by a Danish bike shop, I should remember to spin some back wheels and get a feel for factory-fresh resistance.

My first bearing tightening issue was a bearing retainer failure (non-drive side) during or shortly after a big downhill on a hot-for-Oslo June afternoon, apparently braking was the final stress that tipped things over.  Once I reached the flat at the bottom of the hill, it was a fairly short distance before the wheel started crunching.  The bearings had lasted about 6 weeks after I had greased the hub.  I was surprised by this, because it wasn't the first Nexus 7 that I had greased up (the first one was the hub contaminated in Denmark).  I greased the first hub on the 1st of Feb 2018, and has done fine since.  I concluded that the cone adjustment nuts had probably loosened on this 2nd Nexus 7.  I grabbed the bearings and retainer from a different wheel, put things together again, and its been fine since.

I also greased the Nexus 8 that was Muc Off'ed in Denmark.  I was very pleased how the wheel spun so easily and had no observable looseness (as in, I observed no play).  Seemed good.  I guess I rode a couple hundred km's before I decided to do an uphill stretch standing on the pedals in 5th (direct drive).  As before, the bearing retainer (also non-drive side) broke into bits and this time the wheel was partly jammed, couldn't even roll the bike all the way home.  With this failure, it seemed clear the cone adjustment nuts where not loosened, apparently they were just not set tight enough.  So I fixed that also by replacing the bearings and retainer, but it wasn't so long ago that I can say how it will last.  (Side note: the bearings and retainer for Nexus 7 and 8 are interchangeable, at least for the hubs I have, and spares are possible to order.)  This second failure was the point that I adopted the procedure outlined a couple paragraphs above.

Anyway moving on to farther in the past, in 2017 we had bought a gear-hub bike for our son down in Denmark and almost immediately it went out into the forest and got a bit wet.  Apparently more wet than we realized.  We left it in Denmark until the next summer, and when we returned I noticed some roughness while spinning the rear wheel.  Upon returning to Oslo with the bike, I took the hub apart and was met by rust, as shown.

rust in the drive side bearings
of a Nexus 7 (SG-C3000-7C)

rust on the guts
rust in the shell
In light of the amount of time that bikes with these gear hubs are ridden or parked in the rain, I'm pretty amazed that this hub had sufficient water ingress to rust.  We did get it discounted from a bike shop, maybe it had more of a history than we realized, or perhaps these hubs are particularly vulnerable to water found in forest settings.  Or perhaps my son submerged it.  Anyway it works pretty fine except when coasting, then it rumbles.

A bit of a shame that the newest Nexus 7 in the fleet was damaged so soon after purchase, but I'll see about getting some years out of it anyway.  As much as I love to hate these things, they last forever.

Friday, April 22, 2016

Gear hubs and high torque

So gear hubs are a bit limited compared to derailleur gears when it comes to input torque.  I've been playing with gear hubs and high torque for some years, and two things come to mind:

  • torque can plain break the hub (done that)
  • torque can loosen the axle nuts (Nihola has front-angled dropouts, so the axle can move if its loose)

I've only broken one hub with torque, a SRAM P5 with 38f and 24r sprockets, where I was standing on the pedals while trying to rock a Nihola over something in the forest.  I've used a similar input ratio on two examples each of Shimano Nexus 7 & 8, one SRAM P5 I didn't break, and now one SRAM S7.  Having been using a ratio like that on various hubs in the hills here, I'm starting to feel like I have information to share.  So lets do that.  On the two Nexus 7's, even with the 38x24 input ratio I need to work fairly hard to climb the steepest hill of my commute, and the gears that give 1st 'gear' and contribute to 3rd 'gear' do get a bit nasty after a while, rough and unpleasant, but still functional. (As always, fresh grease seems to help.)  The SRAM S7 hasn't been through long enough abuse yet (and no winter use), but 1st and 2nd do feel a bit rough when pushed.  Its nice that '1st gear' isn't being reused as part of '3rd gear' on S7, like it is on Nexus 7.  S7 by comparison has a lovely smooth 3rd, not to mention 4th and all the high ratios.  So I can say Nexus 7 is fairly tough, but also it gets nasty, the P5 & S7 siblings are lovely but probably not great with torque, and also out of production.

Nexus 8 seems uneffected by a few seasons of hard climbs, though of course the 3rd & 4th 'gears' are sufficiently unpleasant right from day 0, and the 4th-5th shift is always a bit iffy.  The 1st gear on Nexus 8 is really a great gear for high torque, isn't bothered at all, doesn't get unpleasant when worked.  Nexus/Alfine 8 are often used with crank-mounted electric motors, which is a big vote of confidence.  Still I don't like these hubs on the hills because everything sitting between 1st and 5th seems inefficient, and I need to spend a lot of time there on my commute.

My one line verdict: Rohloff is flawless, or an Alfine if you don't need perfection.

I have a theory about gear hubs and torque.  Of course the input torque goes up as you increase the ratio of the rear sprocket to the front sprocket, and torque breaks hubs at some point.  (Would break anything, at some point.)  But the work being performed is actually determined by the radius of the tire & wheel, and the load which is bring pushed up the hill.  So the problem isn't the input ratio, the problem is the tire, the load, and the hill, and the input ratio simply makes it easier for the rider to apply the needed torque to climb the hill, given the tire, and the load.  So if you're already going to climb hill X (maybe you live on top of it) with a 20-tooth sprocket and thats a lot of work, its not more abusive to your bike to make your life less painful by jumping to 22 or 24 teeth.  (Having said that, I do try to be more careful on hubs with high input ratios.)

Loose axle nuts are the real day-to-day irritation of high input torque on a common gear hub.  In particular, it effects bikes that do the standard Danish thing: using front-facing dropouts and no means to hold the axle in place except the nuts.  This can manifest in various ways.  For example, this spring I have switched to using a freshly-greased S7 to commute the 21kms between home and work.  I have some experience about how to install these things, so I cleaned the axle threads, applied some grease, and torqued the nuts good.  After some time I had noticed that the it seemed an internal component of the hub would rotate some distance when I shifted into 5th & 6th, and again when I shifted into 2nd & 3rd.  It didn't manifest in 4th as far as I could tell.  I could get 'the rotation' in 3rd gear, shift right to 5th, and feel it again.  I had initially checked the axle nuts when this started happening, and found them tight, so I supposed the well-used hub was showing its age.  After some time I started getting a noise while climbing in the low gears.  I stopped many times to look for its cause.  I noticed the kickstand passed pretty close to the spokes, but didn't touch when I tested, and the noise only happened in the low gears.  At the same time, I'd been having some trouble with the chain hopping off the sprockets.  Eventually I took 15 minutes and dug into it, and the nuts were loose, but it took some effort to actually move the wheel by hand.  I needed to use a flat screwdriver to pop the anti-rotation washers free of the frame, needed to loosen the brake torque arm, then worked a bit on getting the wheel pulled back tight and torqued good.  That solved the rotation, the noise, and loosing the chain.  This was an especially tricky case of loose nuts, usually I can see the wheel has gone a bit crooked in the frame, but not on this bike.  This bike apparently allowed/forced the wheel to re-center itself every time I got off to look.

Many times I've dealt with this on Niholas as well.  About the only solution at hand is making sure the axle nuts are applied tight, which presupposes that the threads are clean and lightly greased, so that the nuts don't get bound up on the threads themselves.  The grease of course should not get all over friction surfaces between the anti-rotation washers and the frame.  Been a while since I've had to mess with this on a Nihola actually, but its worth paying a bit of attention each time the rear wheel is installed, so its done right, and the axle stays where you intended.  Also I think its worth carrying a 15mm wrench.

Sunday, July 20, 2014

Brakes

An unusual Nihola that was pictured on the French Nihola site.
The picture above shows a special Nihola.  It has disc brakes in front.  And it also is designed to carry pallets, which is a bit unusual.  But about those disc brakes.  Disc brakes are unfortunately not an option that be ordered on a Nihola by anyone who isn't willing to pay for custom fabrication.  Its easy to see why the Nihola company selected mild-mannered and inexpensive drum brakes up front when virtually all Niholas are sold in Copenhagen, where such brakes are sufficient, even optimal.  Notably the big competitor Christania Cycles does offer disc brakes, as does Bullitt.  There is certainly no need for the strength of disc brakes in Copenhagen, but they look good and who knows, maybe the maintenance isn't too bad.  Its a bit unfortunate, in my opinion, that the Nihola company doesn't offer to take people's money in trade for a disc brake option, because what is decorative in Copenhagen could be practical in Oslo.
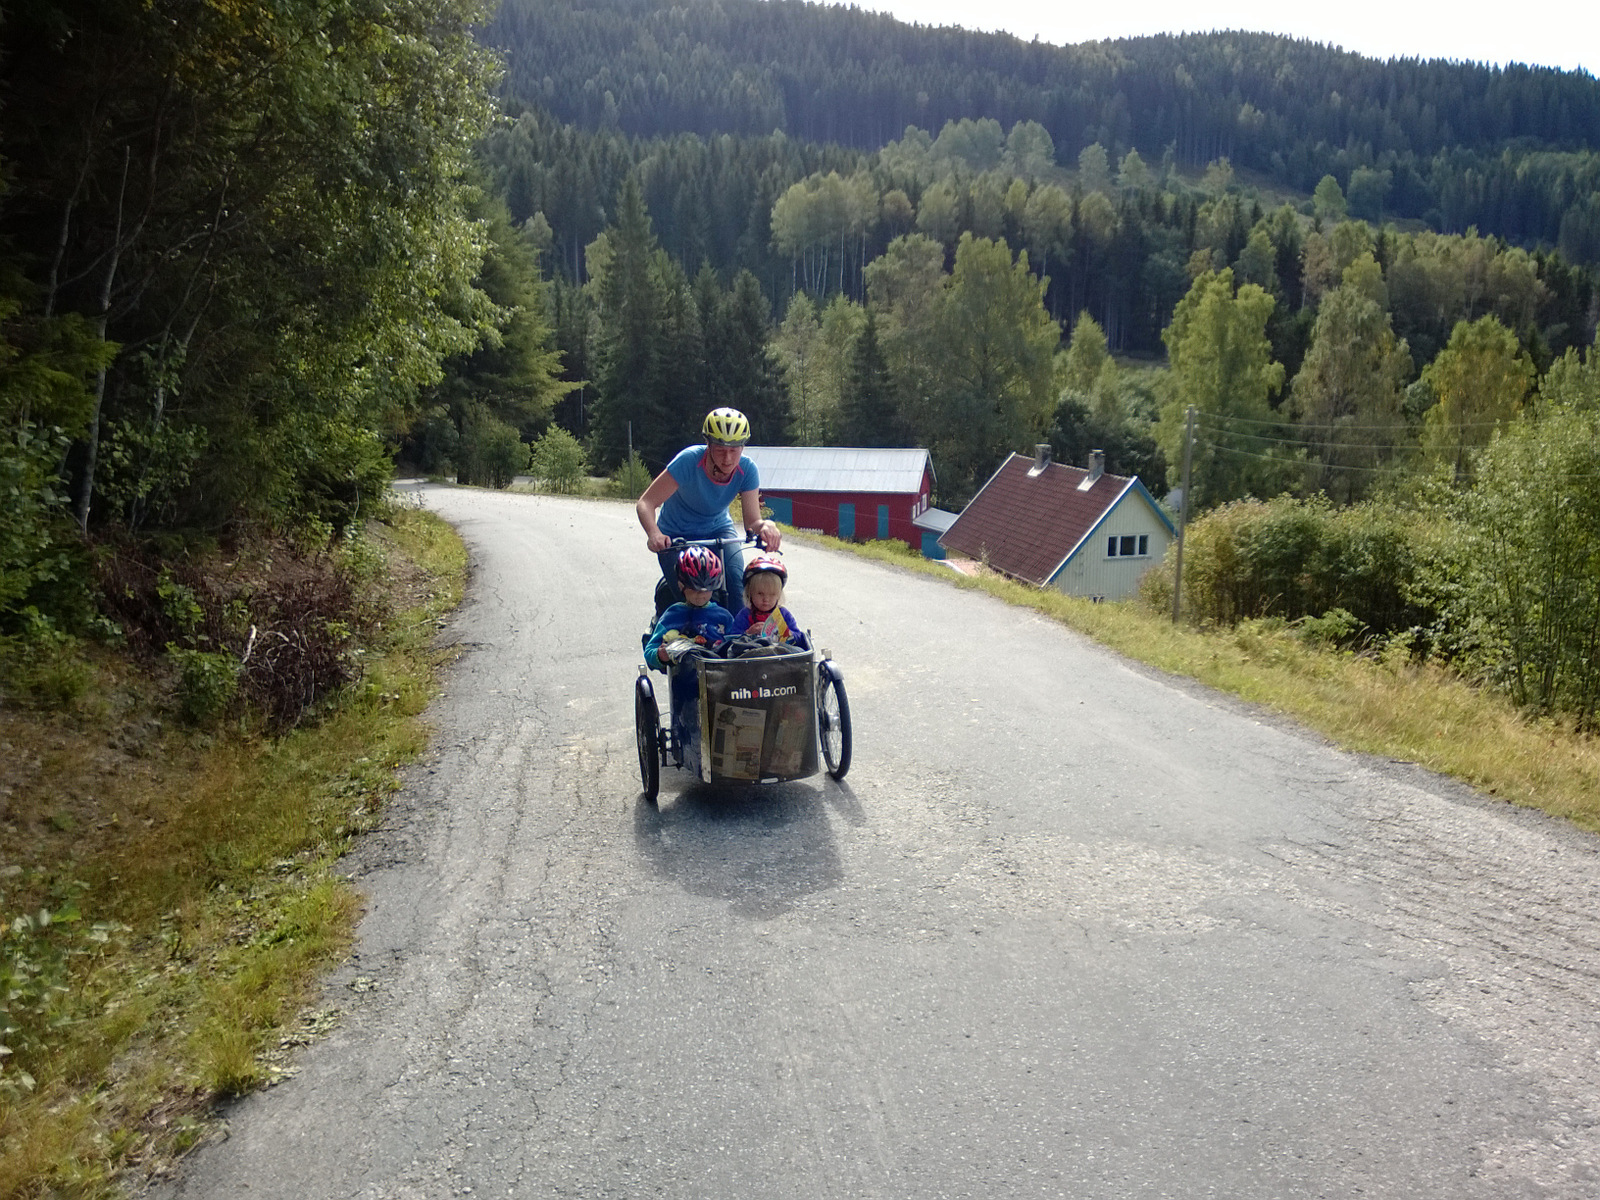
Its hard to photograph a hill, but this was a good one.
Climbing out of a valley on route from Hønefoss to Oslo.

So I should talk about how braking works on a Nihola.  The rear is either a coaster brake (foot brake) or a v-brake, but could in theory also be a different type of hub-mounted drum such as a roller brake (grease-filled drum from Shimano).  I estimate that there is zero possibility of a disc in the rear, the lack of mounts being a prominent problem, but also the shape of the frame appears incompatible, which is a shame because all the most interesting gear hubs are available with disc mounts.  Discs aren't perfect, but I'd take a disc over a rim brake on the rear wheel of a cargo bike.

Now, the rear brake doesn't necessarily need to be strong.  Ideally it is easy to modulate, to use whatever traction is available.  Foot brakes are not known for being strong, but are more than strong enough to skid the back tire on clean pavement (presuming no weight on the rear rack).  The reason that strength is not a problem is because of the significant forward weight transfer under hard braking, especially when weight is concentrated in the box, and also especially on downhill slopes.  This all is to say, the rear brake is generally of little use for quick stops.  This effect is more significant on a Nihola than a regular bike.

Regrettably, the brakes in front are also of little use for quick stops.  They are always 7cm Sturmey-Archer drums, a type of non-greased drum with a replaceable brake shoe.  One single-pull 4-finger lever pulls to a splitter which seeks to distribute force evenly between the left and right, or perhaps it just seeks to keep the cables to each side the same length.  There is, anyway, a splitter which has the potential to allow more cable to be pulled on one side than the other (this pulling is not smooth in my experience) and which has the potential to keep the cables to the front brakes roughly the same length.  It seems to me that the observable strength of the front brakes is usually mismatched if any particular strength can be observed at all, so the splitter is not an effective way to balance braking power.

The brakes, freshly adjusted, are strong enough that on flat ground, with an empty Nihola, I need to brace myself against the handlebar when doing a 100% stop.  Some exertion is required, but certainly no danger of going over the bars unless I could somehow brake without having my hands on them, and certainly no possibility of lifting the back tire off the ground.  Gradual and smooth is the idea.  This is mostly fine at reasonable speeds and on flat ground, but hills are more problematic.  By about 10% slope, I get the impression that the brakes are mostly there to prevent speed from increasing.  Stopping requires planning ahead.  The steeper the slope, the more planning ahead is required.  The brakes are sufficient to hold the trike in place to over 25%, which I suppose is evidence that stopping is possible at such a slope, but this will require the rear brake to be used without much skidding.  A skidding rear tire is not being very helpful.

Skidding the front tires is not easy to do.  The easiest way is to brake hard when turning sharp corners at speed.  Often, because the strength of the front brakes is likely imbalanced, this is possible turning one way and not the other.  About the only other time I've managed is when one brake arm is seized up, apparently causing the other brake to gain strength, which can skid a tire on gravel.  Load in the box makes skidding a lot harder.

The view on a day tour. 
Lots of people will say drums are a low-maintenance cycle brake, but I've spent plenty of time screwing around with the drums on my two Niholas since moving to Oslo.  Understandably, stopping 150kg of trike, cargo and rider on some of these hills can be demanding.  The brakes can easily get too hot to touch.  It rains, it snows, salt and/or other chemicals are sprayed around, there is sand and gravel, mud... sometimes I get plants caught up around the brakes, and often enough they stand outside in the weather.  Its true that little cleaning is required.  There is no particular seal on the brakes, just a design which makes it somewhat non-obvious for water to flow in.  Mostly that appears to get the job done, but if moisture enters, the brakes can be weaker while wet, and can rust a bit on the braking surface.  The rust wears off but appears to contribute to lumpy and/or squeaky braking.

Squeaking from the front brakes can be a major irritant, but can also be entirely nonexistant.  Its difficult for me to figure out what causes the squeaking or how it can be fixed.  Simply using the brakes more will only silence the squeaks until the brakes cool down again, and cleaning seems to have only a short-term effect, but sometimes the passage of time (or the change of weather) seems to change the squeaking situation.  I got though months of snow and melting this winter with perfectly quiet and predictable brake behavior for no reason I can see, although there was some squeaking a week or two after I tightened up front brake cables in the summer.  Squeaking is often associated with strong braking performance, but not always.  There is a possibility that getting the brakes very hot encourages squeaking the next time (next day) they are used.  Mysterious.

The center adjuster with its rubber cover pulled up.
So, maintenance.  The brake arms need to be lubed (drip or spray some oil at the base) or they will start to seize up, which can have interesting effects because it may start causing all cable movement to be "routed" to the easier-to-operate brake, in a crude way.  Definitely oil those arms.  Brake dust might need to be cleaned out from time to time.  Cable stretch and/or brake wear require the brake cable to be tightened, and this is the most interesting bit of service to perform.  For small adjustments, there is an adjuster in the center, above the splitter.  For big adjustments, I have found that the center adjuster should be slackened, the cable fastening bolts on each brake arm should be loosened, both brake arms should be fully engaged (full brake), and the fastening bolts should be tightened again.  So the brake arms are held some distance towards engagement permanently.  Surprisingly, this does not result in dragging brakes, merely a firm brake handle and optimized brake strength.  A brake handle which pulls up close to the handlebars indicates that braking strength could be improved.  In other words, it seems that more strength is delivered when the brakes engage early in the travel of the brake lever, even in the case of a brake lever that pulls a long way but does not touch the hand grip.  I don't know why that is, but the difference can be very noticeable.

The splitter, just a round thing that the brake cable is looped over.  Note center cable at the top.

An exposed brake, with the brake arm visible to the right.
A wrench being used to hold the brake arm fully engaged while the cable on the other side is fastened.
The drums behave strangely when asked to deliver 100%.  The strength seems to reach a certain level fairly easily, and then does not improve further, regardless of the force applied to the brake lever.  I expect that the cable liner running between the lever and the spitter has started to compress at that point.  Fitting a more compression-resistant section of cable liner could improve braking strength.  I've also been tempted to set up the left and right brakes with separate levers, using a foot brake for the rear.  This would have the potential to be a lot of fun on downhill corners.

I've noticed that Sturmey Archer makes a 9cm drum that almost fits on a Nihola, as far as I can tell from photos.  Certainly the Nihola company could make it fit with a small alteration to the piece of metal that is tasked with anchoring the top of the brake's back plate and the fender.  I imagine the 9cm drum would be stronger for the same cable tension, longer lasting, slower to heat, and make for a stiffer wheel (the front wheels have a hard life).

Anyway the brakes on a Nihola are probably the weakest link for 'ambitious' owners.

Friday, February 21, 2014

Nexus 8 SG-8C20

When I broke the SRAM P5 that came with our blue Nihola, we spent considerable time trying to find the right replacement.  It would have been a Nuvinci N360 with a roller brake, except the shop in England selling N360's wasn't really interested in ordering one with a roller brake mount, and bike shop employees in Denmark seemed to have little time for "strange" hub gears.  Basically people were not interested in being paid to do anything they didn't normally do; perhaps the margins were too small for them to care.

The Shimano Nexus 8 with foot brake would be another good option, except in Denmark (and some other countries) it was only possible to order the old SG-8C20 version.  It seemed that Shimano refused to sell the SG-8C31 until the old model was sold out (on a per-country basis), and no one could order one for me, nor could I find any for sale online.

I also considered the SG-8R36 with a roller brake, but it was more expensive and we wanted to stick with a coaster brake (foot brake) unless we had a really good reason to change.

So we ordered the old model, the SG-8C20.  It had probably been sitting on a warehouse shelf for years.  I installed it myself.  Right away I had some issues because the "cassette joint" wanted to occupy a bit of space which the chainstay was using.  I installed some extra washers and bent the cassette joint a little to get the shifting in order, but the whole thing was always a pain to fiddle with.

The hub itself was functional, but made me nervous that it was headed for premature death.  From day #1 it made various clicks and had various shifting issues between gears 4 & 5.  Gear 5 (direct drive) seemed like it might slip at any time (but it never actually slipped, except after shifting from 4th).  Adjustment of the shifter could address the various issues but always at a cost somewhere else.  At some point, the clicking and humming alone was enough for me to know what gear my wife was pedaling in, if I rode along behind her.  Still, it was working.

Happily it seems there are ways to address these problems.

The Nihola company had started using Nexus 8 hubs (I presume SG-8R31), so when visiting Copenhagen I checked with them to see how they handled the cassette joint.  Turns out they had some different non-turn washers that I didn't realize existed: 5L and 5R.  They sold me a set of them for a reasonable cost, and one source of irritation dissappeared.


On my next visit to Denmark I took the Nexus 8 into Byman Cykler and had them put some new grease in it.  Now this was the magic the hub needed.  Most of the noises and shift problems vanished and haven't come back (in over 4 months).  So, moral of the story: hubs like fresh grease.

There is one lingering irritation with this hub, however.  It works its axle nuts loose over time, and then pulls itself crooked in the frame.  I guess I'm putting too much torque on it.  Always carry a 15mm wrench!

So now I can make a bit of a verdict on the Nexus 8 with coaster brake as a hub for a Nihola.  Its pretty good.  A bit rough in 3rd and especially 4th gear, in fact its generally a rough hub.  Buts its strong: ours is set up with a 24t sprocket on the hub and 38t on the crank, well beyond any ratio any hub company endorses, and I've put my entire weight on it countless times, plus added arm strength.  I've gotten small blisters from pulling on the handles to force the pedals around.  (I do these terrible things in 1st gear exclusively, which is probably the strongest gear available.)

The Nexus 8 is a strange hub.  Its not symmetric (i.e. the top ratios are not mirror images of the bottom ratios) and the least efficient gears are in the middle of the range (3 & 4) rather than the ends.  However this works out well enough on a Nihola.  For any real hill, I just drop to 1st gear and pedal.  On any reasonably flat ground, I can stick to gears 5-8, which are mostly pleasant.  I never make any strenuous effort in 3rd or 4th gears.

The foot brake is strong enough to slide the rear tire at will, though Oslo hills might cook the hub.  More than once I have been unable to touch the hub's shell after a good downhill.  After that happened a few times, I decided to have a V-brake installed in addition to the foot brake, so now that Nihola has two rear brakes.  Overall I am very pleased with the foot brake.  I'm convinced foot brakes are the best rear brakes for Niholas, except possibly in deep snow, ice, or mud.

But is the Nexus 8 a worthy upgrade over a SRAM P5?  For any moderately serious cyclist, I would say yes.  The ratios are closer, which makes it easier to go fast without knee injuries.  The lowest ratio is good and low.  The hub itself is stronger.  It shifts easier.  Its easier to handle a freezing shift cable.  There is no "clickbox" sticking out in the way of pannier bags.  On the other hand, the P5 is a lot smoother in operation, its likely a bit more efficient, and it doesn't take tools to disconnect its shift cable.

Anyway, Nexus 8 is a good Nihola hub.

Wednesday, October 16, 2013

Postal cargo trike

While in Denmark I had an idle moment in the presence of a postal Nihola.  The postal service in Denmark has purchased perhaps a couple of thousand of them.  Its an interesting design, and the parts that they didn't change from a regular Nihola are interesting to note.

A postal Nihola is mostly a standard model with a different front end.

Basically the front is swapped out for a float-loading platform, there is some modification to the frame where the rider steps over, and the rear has a gargantuan cargo rack bolted on.  They use an electric-assisted derailuer system, with what looks like an above-average motor, rim and tire.  But importantly, the rear frame and steering are hardly changed from a regular "little" Nihola.

The rear rack is epic, and the frame is modified for a lower stand-over height.

Also interesting is that they didn't go with a classic box box trike like Christiania.  They have a small number of such trikes already, and apparently did not find them to be the right choice.

Saturday, October 5, 2013

Cake, curbs, and paint

Three items for today's post.  First of all, when carrying cream cakes in a Nihola, don't let them bounce around in the bottom of the cargo box.  Put something soft under them.

Ohh, thats a sad thing to see.

Next up, and unrelated to the cakes, I have determined that a good low gear ratio allows some really nice curb climbing even while loaded.  Without any particular effort, I drove something like 40kg of kids and crap up the curb shown below.  I'm estimating it was 5 inches.  Go slow, one wheel at a time, at perhaps a 45-degree angle, but steer into the curb at the moment of climb.


Finally, the paint quality of a Nihola.  I don't know anything about paint really.  I'd say that the quality seems to be pretty good.  It is thick and evenly applied.  I have seen no defects in the paint of either Nihola.  However I have been able to damage it many times.  In particular, the top rim of the box is easily hammered by metal objects being carried, which quickly takes care of paint.  Secondly the front-bottom edge of the box can easily be run into things; a nice rock will also take care of paint without trouble.  The third issue is on the dropouts.  This is the biggest and most annoying problem.  Here I have seen large flakes come off, and it seems to be impossible to avoid damaging the paint if the wheel needs to be removed.

For our black-framed Nihola I got a small can of black paint which I use for touch-ups.  The orange-framed Nihola just gets treated real nice, but the dropouts have now started their inevitable journey towards large scale paint loss (and re-touching).

Paint loss has started.

Advanced paint loss, loose chips removed, prior to a quick sanding and painting.

On the positive side, it seems the frame (especially around the dropouts) does not rust aggressively.  I imagine that nearly all of the many thousands of Nihola owners in Copenhagen ignore it completely.

Monday, August 19, 2013

Commuting 2

I've been commuting on my bike most days the past two weeks because one of our Niholas is temporarily out of service (more on that later).  This morning while driving my regular commute I noticed that, despite the somewhat low inflation on my 622-37 tires, my bike was trying shake the meat off my arms.  Hmmm, the Niholas don't do that.

On my way home, after having picked up my son, I had the chance to drive over some roots on a little path, using my bike.  I wasn't looking to drive over roots, they just happen to be on the path, and the path is very narrow.  It turns out that I had driven over the same roots this past Friday with the Nihola and actually hadn't really noticed them, but on the bike they were impossible to overlook, very bumpy.

Its interesting to switch back and forth between bike and trike, it brings the differences into focus.  This is a bike with 622-37 tires, not some skinny racing slicks, and not even inflated to a level any performance biker would tolerate, but in many cases it rides rough compared to the Niholas.

My commuting bike, totally out of place in the land of sport commuting that is Oslo.
Wandering off topic...

Interestingly, this bike is a reputable Danish name sticker on some soulless multinational corporate asian-made bike.  It costs half what a Nihola costs, if we don't add options like child seats to the Nihola that the bike clearly doesn't have.  But this isn't actually as favorable to the bike as it might at first seem.  The Nihola is made in Denmark, built to order, you might even meet people who assemble it.  Every part is quality and likely to last.  To contrast, the bike is sold a chain store that shovels crap in bulk.  The spokes on mine started rusting within weeks, the kickstand failed, every last piece of plastic has failed in three years, and the handles have creaked since day one.  They even outfitted it with a poorly-sealed gear hub.  (On the positive side, the tires are great.)  Anyone who didn't want to fix a bike themselves would have thrown it in the trash already.

A Nihola might actually have a lower cost per km as a commuter than a typical name-brand Danish street bike, if you are careful with your options on the Nihola, and maybe a bit unlucky with the bike.

Thursday, August 8, 2013

Rain

At 6:30 this morning dark clouds and thunder were rolling in.  This leads me to write about how a Nihola works in the rain.

Niholas of the child-carrying forms have steel frames, plastic box sides, and aluminum box floors.  The optional child seat is plastic with an aluminum bar underneath, with an optional removable cushion on top.  There is an optional rain cover made of strong fabric with plastic windows, supported by two aluminum bows.  The only thing here that is effected by standing around all day in the rain is the cushion; it will soak up water if the roof is not installed.  It dries out easily enough.

The roof itself appears to withstand any amount of rain for any number of days, so many people (maybe most people) in Denmark never remove it.  I think this is a poor idea.  The roof stands between the rider and any human cargo, making it harder to see or hear.  Its visually huge, it wiggles a bit on bad bumps, and it pushes around a lot of air to allow its passage.  The roof works on my mind, making the whole trike seem bigger, clumsier and slower.  It also gets ugly with time, getting bleached in the sun and stretched in the rain, and the windows can deteriorate.  I always take it down when its not actually raining (or unless there is some other good reason, perhaps to protect cargo in a parked trike).

So, its good news that it can be taken down and put up easily.  The supporting bows sit snugly on the floor of the Nihola, where they rattle only a little, because they flex slightly when being laid down, thereby holding themselves in place.  The rods can be removed while the seat is installed, but there isn't a lot of extra room for maneuver.  Cargo and children in the box makes it harder, but children cargo can sometimes cooperate and lift up their legs on command.  The roof itself can be folded or otherwise mashed under the seat without difficulty.  The process is easy, repeatable, and without surprises.

The bows in storage position.
The bows without the roof.
Roof up!

When the roof is up, the ends of the bows sit in small cylindrical holders in either side of the box.  There is nothing holding them in there except the roof.  They will wiggle themselves free if left to themselves, and probably they would be easily damaged anyway.  They are just aluminum rods, after all.  The rods and roof seem to reinforce each other somewhat.

We have two different models of the rain roof.  The more fancy one has a strap that allows the "front door" to be rolled up and held in place.  Otherwise, the door can be pushed behind the heads of child cargo without being rolled up.  It can also be draped backwards over the top of the roof, but the Nihola company advises against this, because it can apparently harm the zippers.  Better yet, the whole roof can be taken down.

The easy way to get the door out of the way.  Not recommended.

Lots of headroom.  Not a lot of options for partial openings.